 With the release of NetScaler 11 the Unified Gateway feature became available. Besides that the Unified Gateway enables companies to create a single point of entry for different types of connection (from full blown VPN to ICA proxy and everything in between) it also comes with a landing page where users can access their (SaaS) applications. This is a great addition to the (already long) list of use-cases for a NetScaler in your network.
Now if there’s something users hate than that’s doing things more than once. So when companies make the (ow so logical) transition from “legacy” Windows applications to SaaS applications, so they no longer have to care about how that application works / runs / updates, the end-user is faced with a number of new challenges:
- Where can I find that new SaaS application?
- Why do I have to logon again?
- Why do I have multiple passwords (that change on different moments)?
This is where the Unified Gateway comes into play, it offers a useful landing page where users can find their applications (hey that sounds familiar!). And since the industry made SAML the de-facto standard for authentication to SaaS applications, that might solve the other two challenges!
Long introduction to why I wanted to write this blog, but here’s how you can achieve a Singe Sign-On (SSO) experience from the NetScaler Unified Gateway to ShareFile using SAML.
.
SAML IdP
For the sake of the argument I’m assuming you know what SAML is and that you’ve setup an Identity Provider
In my example I’m using the NetScaler as a SAML IdP, because I can and because it’s actually a really good fit. The configuration of both your ShareFile account and the NetScaler is documented over here (support.citrixonline.com).
Unified Gateway
I’d like my users to have an easy overview of the SaaS-applications and web links that they can use whenever they want. For my demo environment that roughly looks like this:
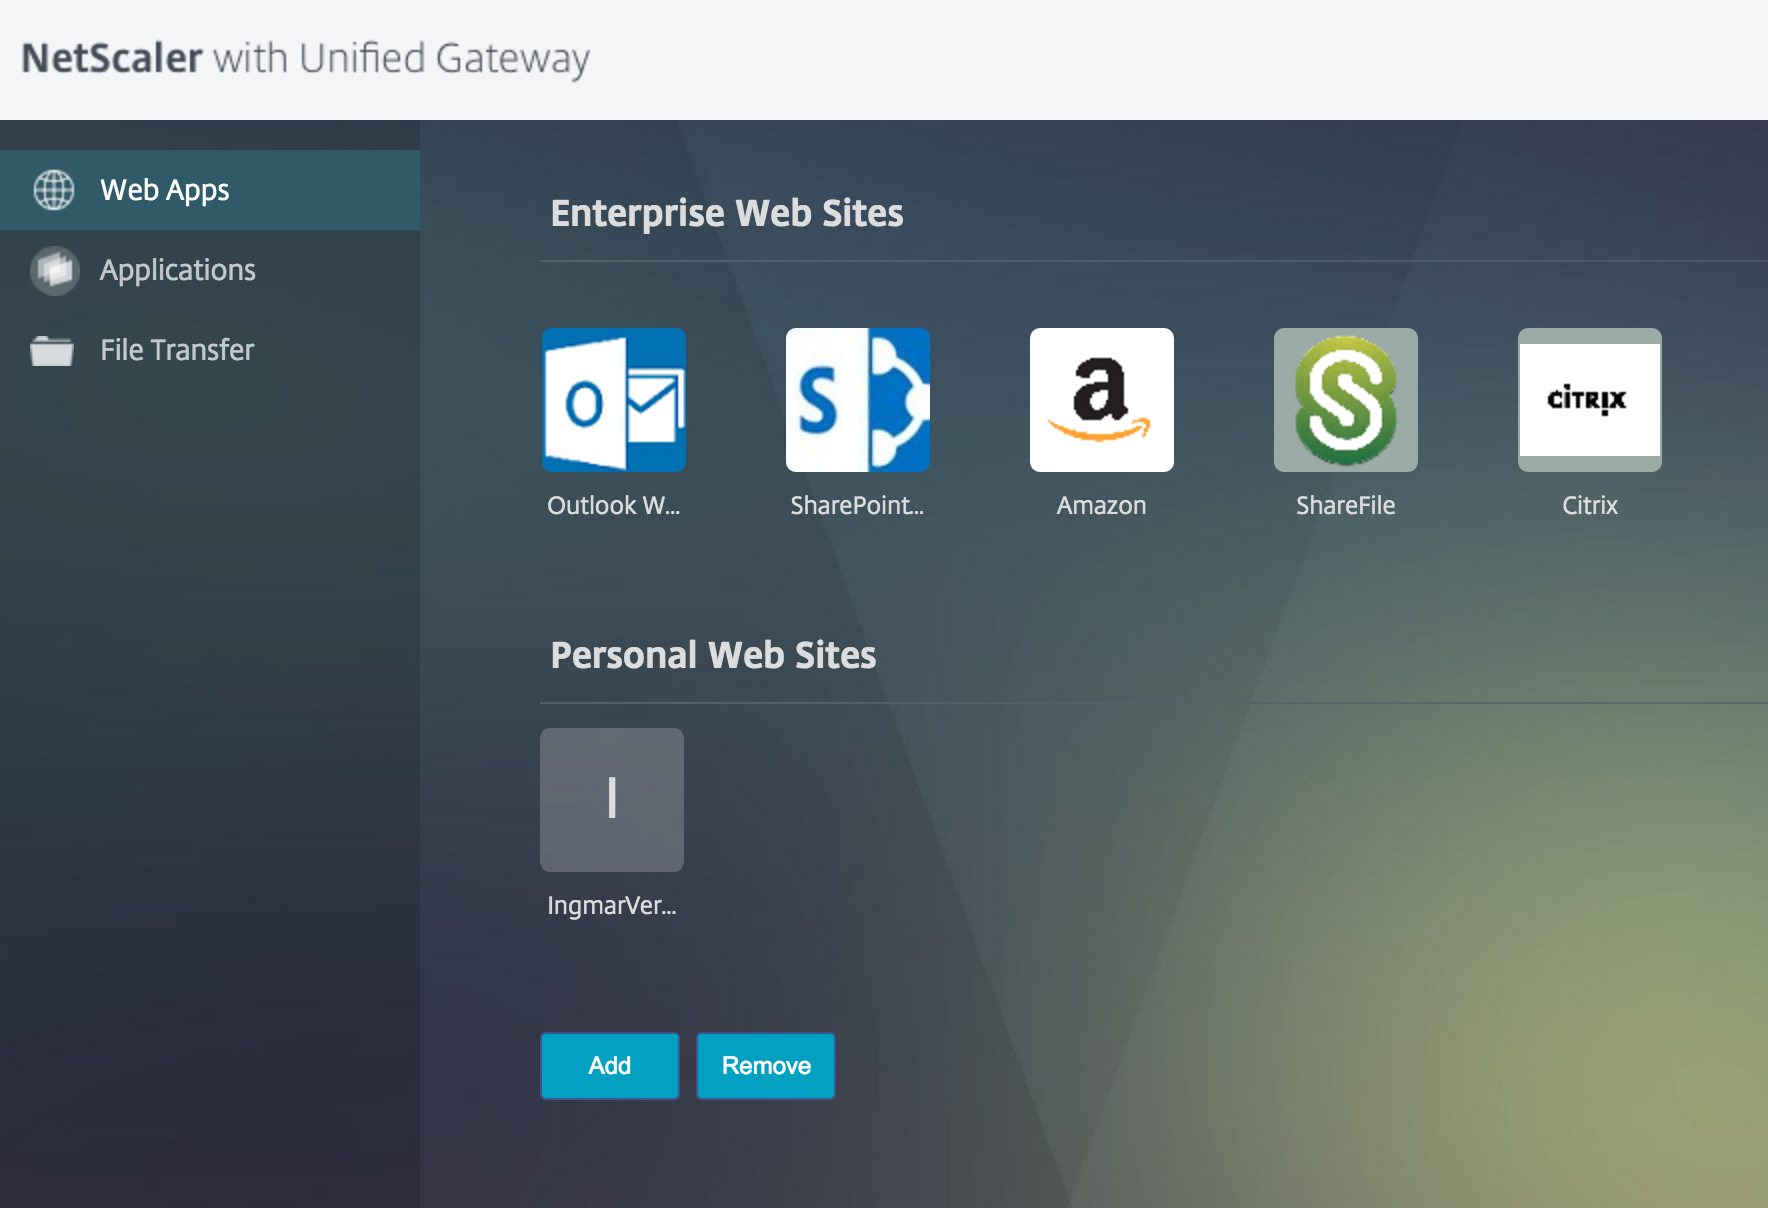
As you can see that includes ShareFile, the subject of this article. Let’s dive a bit deeper in the configuration.
LDAP Policy
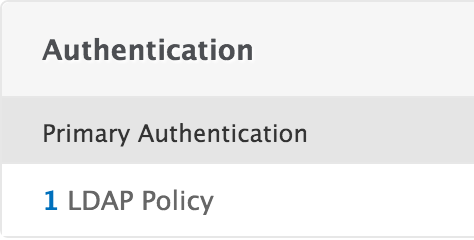
We need to add an Active Directory attribute to the LDAP policy assigned to the Unified Gateway. In the properties of your Universal Gateway vServer go to the Authentication section and click on your LDAP policy.
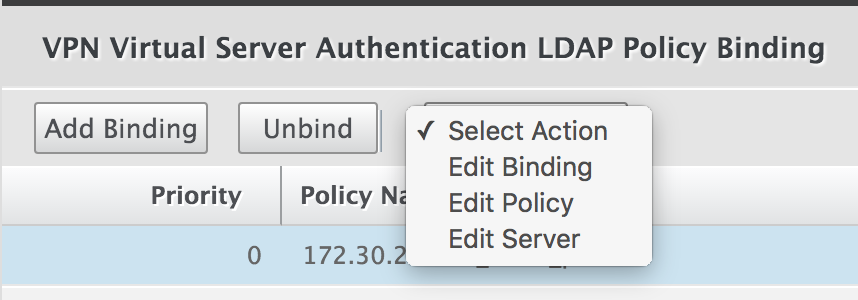
Select the LDAP Policy and click on Edit > Edit Server
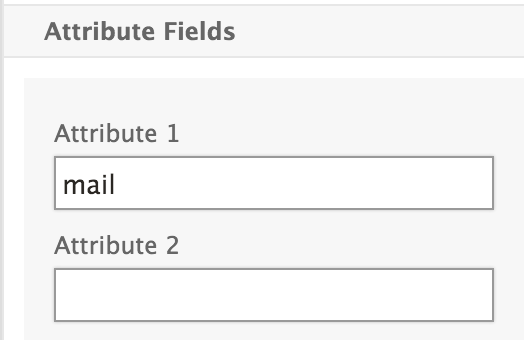
Click on the More link (below) and add ‘mail‘ (without quotes, all lower capital) in the Attribute 1 field.
Bookmark
Create bookmark
On your NetScaler, go to NetScaler Gateway > Resources > Bookmark and add a new resource.

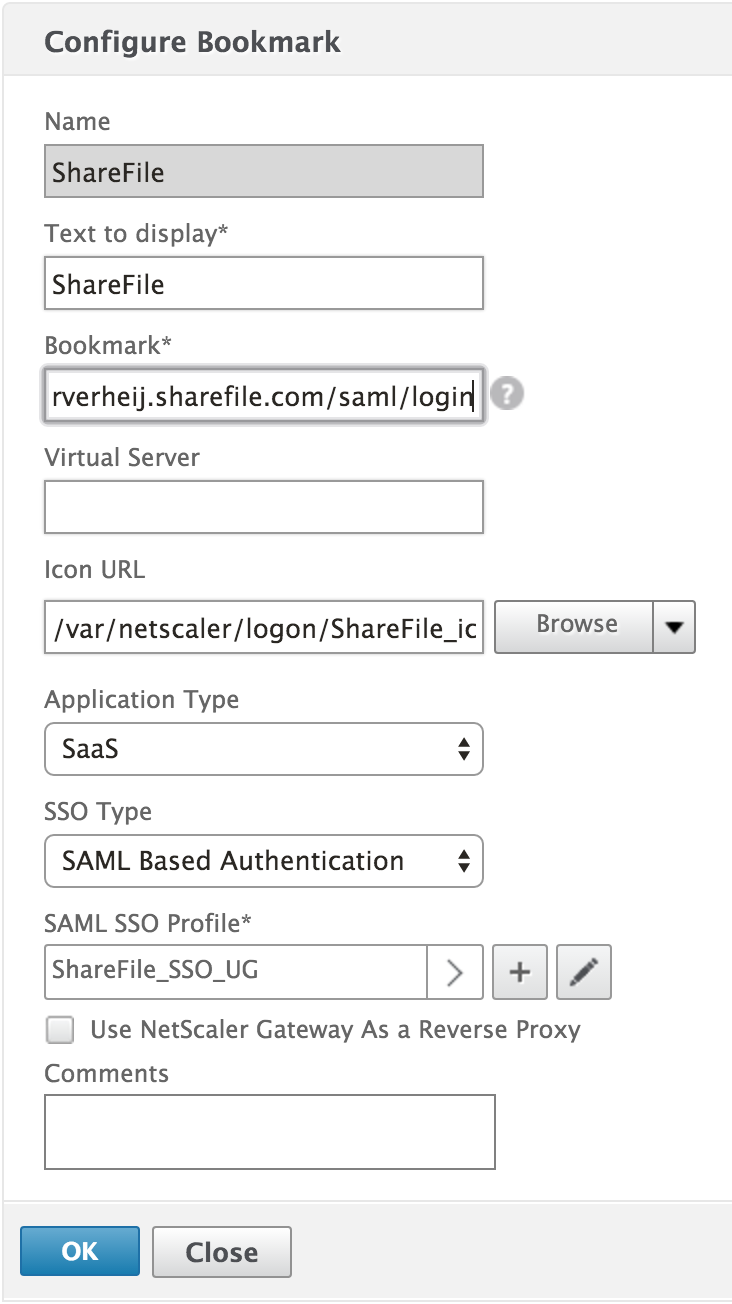
- Name the bookmark any way you want, it’s only used for administrative purposes.
- Text to display is self explanatory
- Bookmark is the URL to https://accountname.sharefile.com/saml/login where accountname is your ShareFile account.
- If you want add a ShareFile icon to display ( ShareFile_icon_70x70 ).
- Set the Application Type to SaaS
- SSO Type is SAML Based Authentication
- …and add a SAML SSO Profile using the [+].
SAML SSO Profile
This is where the magic happens.

Accept all defaults, except:
- The name is just for administrative purposes.
- Assertion Consumer Service Url is https://accountname.sharefile.com/saml/acs where accountname is your ShareFile account.
- I found that the value Relay State Expression doesn’t matter, as long as you fill in something (more info needed), for now I’m using “https://” + HTTP.REQ.URL.QUERY.AFTER_STR(“url=”)
- Signing Certificate Name is the server certificate of your AAA vServer
- SP Certificate Name is the certificate you retrieved from your ShareFile account (SP-Initiated SSO certificate).
- There’s no need to Send Password, so set that to OFF
- Issue Name is the URL of your AAA vServer (in my example: https://5-10-87-73.mycitrixdemo.net:444/)
- Audience is https://accountname.sharefile.com (you get accountname by now)
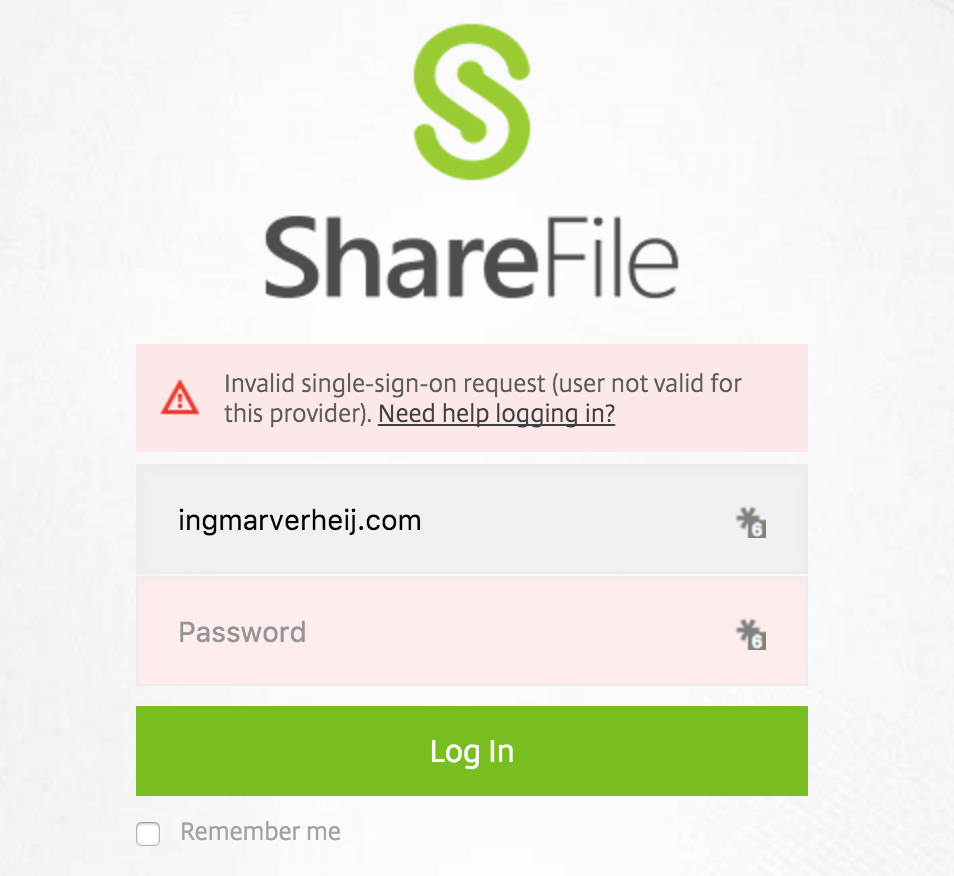
- At the Name ID Expression enter the following stament: HTTP.REQ.USER.ATTRIBUTE(1).
If you didn’t apply the last step (reading the mail attribute) the following error will be thrown. Reason is that the SAML assertion doesn’t include the mail address, and that’s what ShareFile needs to recognise the user.
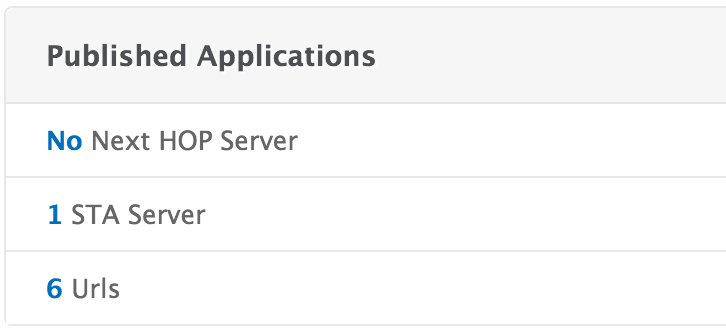
Bind to Unified Gateway
Last step is to bind the (newly created) bookmark to your Unified Gateway vServer.
In the properties of your Unified Gateway vServer go to Published Applications and click on URLs and use Add Binding to add your new Bookmark.

Troublehooting
In case you’re troubleshooting SAML challenges (with or without ShareFile) I highly recommend reading this article from Dan Brinkman: ShareFile troubleshooting: Capturing a SAML token | What Would Dan Do? In addition, I found this Google Chrome plugin to be very useful as it decodes the SAMLresponse for you: SAML Chrome Panel.
Eén reactie