 Working in IT means you never stop learning, change is all around. To keep up with developments and to try out new ideas it’s essential to have a lab environment where I can play around with different technologies.
In the past I’d had a lab environment running in the cloud but I felt limited not having direct access to the hardware. While I have no intention to start experimenting with virtual GPU sharing yet, I might in the future. So I decided it was time to invest in a lab server to run at home. Since the server runs physically runs at home it needs to have fairly high wife acceptance factor (WAF). A stylish design, low power, low noise and fairly affordable server is desirable.
Virtualization
Of course the server will run a hypervisor to virtualize the workload. For one because it allows me to run a number of different workloads without investing heavily in a lot of hardware and second because my daily activities consists of virtualization techniques.
While choosing for virtualization is easy the hypervisor is more challenging. Because of my profession (and interest) my choice is limited to Citrix XenServer, Microsoft Hyper-V and VMware vSphere (all of which a available in a free version). Each hypervisor has its benefits and its limitations, in the end I chose Microsoft Hyper-V. The reasons I chose Hyper-V instead of XenServer or vSphere are:
- Large hardware compatibility list
- Easy to find drivers
- Access to a GUI (allowing me to use the console to manage the VM’s)
- De-duplication (Not available in the free Hyper-V edition, Standard or higher is required)
Specifications
Virtualization allows me to run a bunch of virtual machines simultaneously, if enough resources are available. More resources equal more running virtual machines but also more cost, finding a balance if important considering the WAF. Ow and I’m Dutch and therefore a natural born cheapskate
Since the hardware needed look “friendly” and be affordable I decided I needed a white box.. Honestly it’s been ages since I built my own computer, the last time I did I was a teenager. So I really had to start from scratch and get to know what hardware is available and what consequences the decisions would have.
PS: I started with the idea of using one (or more) Intel NUC’s but after hearing they use “Ultrabook processors” I abandoned that route.
Motherboard
I’m intending to use a Intel Haswell processor with the LGA 1150 socket. One very important aspect when choosing a motherboard is the chipset: H81, B85, Q85, Q87, H87 or Z87. Initially I struggled to find the differences between them but finally found a comparison sheet by Intel and and Wikipedia. Basically if you want to leverage all virtualization techniques (specifically Intel VT-d and vPro) you end up with the Q87 chipset.
 With a chipset in mind (Q87) I had to find a motherboard that provided sufficient functionality (like SATA 6 gb/s and gigabit LAN) and confidence (I heard horror stories about the ASRock). I ended up with the Gigabyte GA-Q87M-D2H. Why? Mainly because it’s available in stores at a decent price and offers the functionality what I need.
Processor
The more grunt the processor has the more VM’s I could power. The more cores the more parallel processor could run, so a quad-core is preferred. While there are 6 and 8 cores available in enterprise hardware, they’re not available (or affordable) as consumer product (they will become available in Q3 2014). To minimize the power consumption I preferred the Haswell architecture leaving the choice between an i5 or i7. The i7 has more L3 Cache and higher CPU clock rate which are beneficial in a virtualized environment.
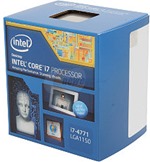 In the end I had to choose between the 4770 and 4771. The 4770 has a number or editions (K, S, R, T and E) with different specifications in power-consumption, clock rate and (very important) virtualization techniques like VT.
After comparing the i7-4770 with the i7-4771 (versus.com) it was clear the differences are minimal but in favour of the 4771. Since I found a supplies offering the 4771 for 7 euro’s more the choice was easy. I chose the i7-4771.
To ensure compatibility with the motherboard I verified the CPU Support List for the Gigagbyte GA-Q87-D2H:
Memory
With the current available technology you can run up to 64GB on common-of-the-shelf hardware (as Aaron Parker showed in his article), but the hardware is limited and therefore expensive. Using a motherboard supporting up to 32GB is easier and cheaper (remember I’m a cheapskate) and “enough” for my lab. I say enough in quotes because you can never have enough memory, just like horsepower in a car. Nonetheless I settled for 32Gb.
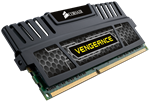 Just like the processor I found it important that the memory is on the Memory Support List of the Gigagbyte GA-Q87-D2H. Secondly I wanted the fastest memory at a decent price. Unfortunately the availability was the limiting factor so there’s no good explanation why I decided to go for Corsair Vengeance 16GB Dual Channel DDR3 (CMZ16GX3M2A1600C10). I bought four 8GB modules and filled all available slots.
Storage
 I need storage to install the hypervisor (Microsoft Hyper-V) on, to store the virtual machines and some space for ISO’s. One of the reasons I chose Hyper-V is because it provides de-duplication, reducing the space required to store VHDs containing the same files (I run de-duplication in “VDI mode”). What’s good to know is that you can’t enable de-duplication on your system disk, for this reason I purchased a separate SSD to run Hyper-V. The speed of each SSD is pretty good and since it only runs Hyper-V that was all I needed, I bought the 60GB Team DARK L3 which costs around 40 euros.
To store virtual machines you want a very VERY fast disk which provides you as much IOPS as you can afford, an SSD disk. There are quite a number of suppliers available but the Samsung 840 Evo is generally a good one. Since I wanted to store quite a number of virtual machines (most of them parked until I want to use them) and ISO files I need a lot of capacity, but SSDs are expensive. To solve this I bought two disks, a fast one (with de-duplication enabled) for VM’s that need a lot of IOPS and a slower disk for less demanding VM’s (like an AD domain controller) and ISO’s.
 I ended up with a Samsumg 500GB 840 Evo SSD as “fast” storage and a spare Western Digital 3GB SATA disk I had laying around for “slower” storage.
Power
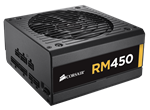 All these components needs to be powered by a PSU. As said in the beginning the WAF if one important aspect of the server which means it needs to be silent and low on power. The Corsair RM series has a “Zero RPM Fan Mode” which allows the fan to spin down when there’s not much power needed. It’s also 80 PLUS Gold certified which ensures it produces less head and lower operating costs. To provide sufficient power to all components I purchased the Corsair RM450.
Case
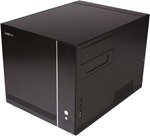 Last part in my quest for a lab server was a stylish case which blended in a normal “home office” environment to improve the WAF. This was actually a tricky part since most cases were either targeted for hardcore gamers / tweakers or to be used as a media-center. I was looking for a slick and small box to house all components, nothing fancy. I ended up with the Lian-Li PC-V351B . When the box arrived I was a bit disappointed as I thought I bought a small square box but ended up as quite a big case. Tip: check the actual dimensions when you order 😉
Shopping List
| Name | EUR | |
| Motherboard | Gigabyte GA-Q87M-D2H | 94,79 |
| Processor | Intel i7-4771 | 218,68 |
| Memory | 2x Corsair Vengeance 16GB Dual Channel DDR3 | 215,21 |
| Disk 1 | Team DARK L3 60GB | 31,38 |
| Disk 2 | Samsumg 500GB 840 Evo | 182,98 |
| Power | Corsair RM450 | 66,53 |
| Case | Lian-Li PC-V351B | 79,17 |
| Total | 891.74 |
Prices are excluding VAT
.
.

I wanted to ask how many Virtual machines you were able to run at a time on this configurations? I’m currently looking at building a decent test lab at home and wanted to see if this configuration would do the trick for me or if I should look at going with the beefed up setup I have been eyeing.
I have the same mother board as you, but I am unable to VMDirectPath pass through USB devices to my Ubuntu VM. Have you tried this?
What kind of testlab you had running in the cloud? What provider did you use?
Thanks!